
You’re at the kitchen line, locked in a dinking battle, and every shot feels like a coin flip. Either you’re hitting it too hard and giving your opponent an attackable ball, or you’re playing it so safe that you lose court position. Your placement is all over the map.
Here’s the thing: consistent dinking isn’t about perfect touch—it’s about systematic practice that builds muscle memory for precise ball placement.
The triangle dink drill transforms your soft game from unpredictable to surgical. Let’s break down how this simple but powerful drill can take your dinking from reactive to strategic.
What Is the Triangle Dink Drill
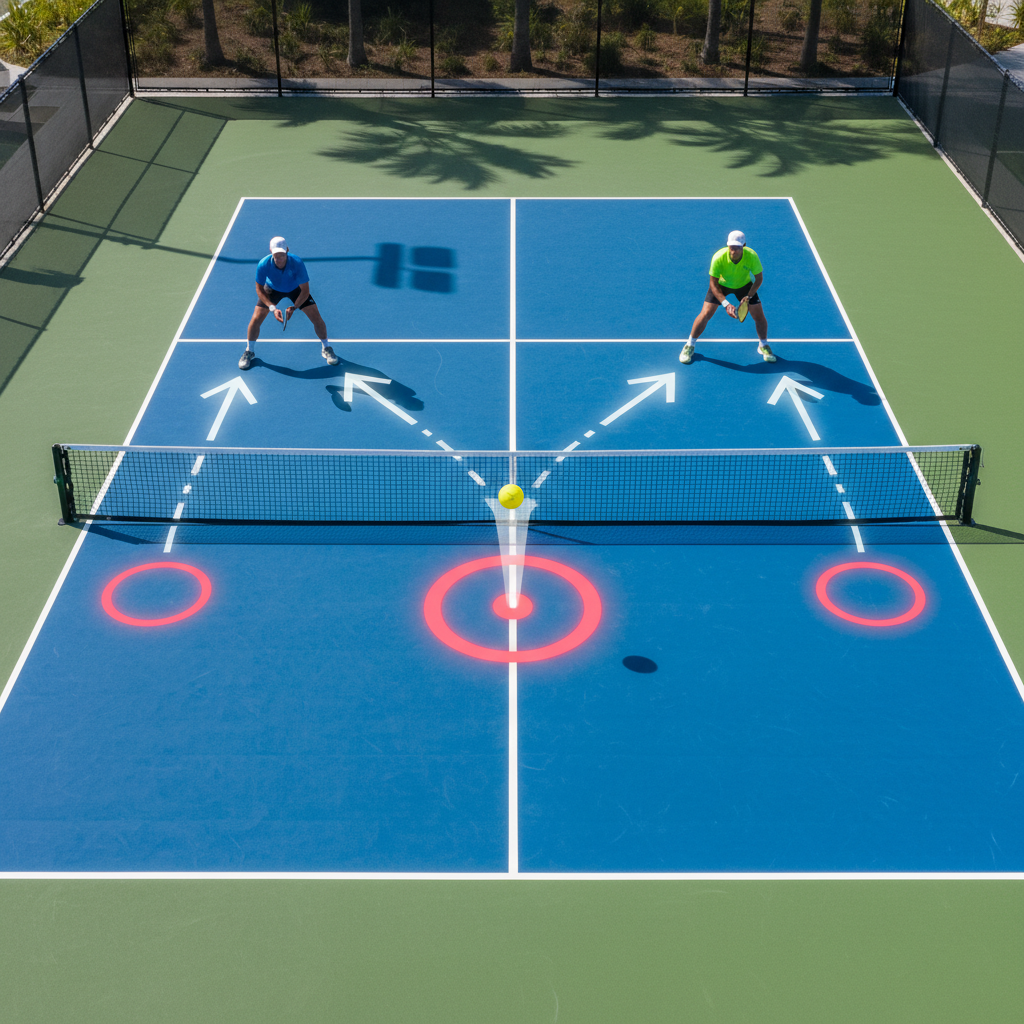
The triangle dink drill is a systematic positioning exercise where you practice hitting controlled dinks to three specific target zones that form a triangle pattern. The drill develops muscle memory for precise ball placement while improving your movement and shot selection at the kitchen line.
This foundational drill teaches you to hit dinks with intention rather than just keeping the ball in play.
Why the Triangle Dink Drill Matters
Most 3.5 players can keep a dinking rally going, but they’re just reacting to where the ball comes. The triangle dink drill changes that completely.
You’ll develop spatial awareness that separates good players from great ones. Instead of hitting every dink to the same spot, you’ll learn to place balls strategically—pulling opponents out of position or setting up your next shot.
The drill builds consistency in your soft game techniques. We’re talking about the difference between hoping your dink lands short and knowing it will land exactly where you want it.
Here’s what separates 3.5 players from 4.0+: intentional shot placement. This drill makes that automatic.

Step-by-Step Triangle Dink Drill Execution
Set Up Your Triangle Zones
Place three targets on your opponent’s side of the kitchen line. Position them to form a triangle: one at the center of the kitchen line, one at the left corner, and one at the right corner about 3 feet apart.
Use cones, water bottles, or even towels as targets. The key is making them visible enough that you can aim precisely.
Master the Basic Pattern
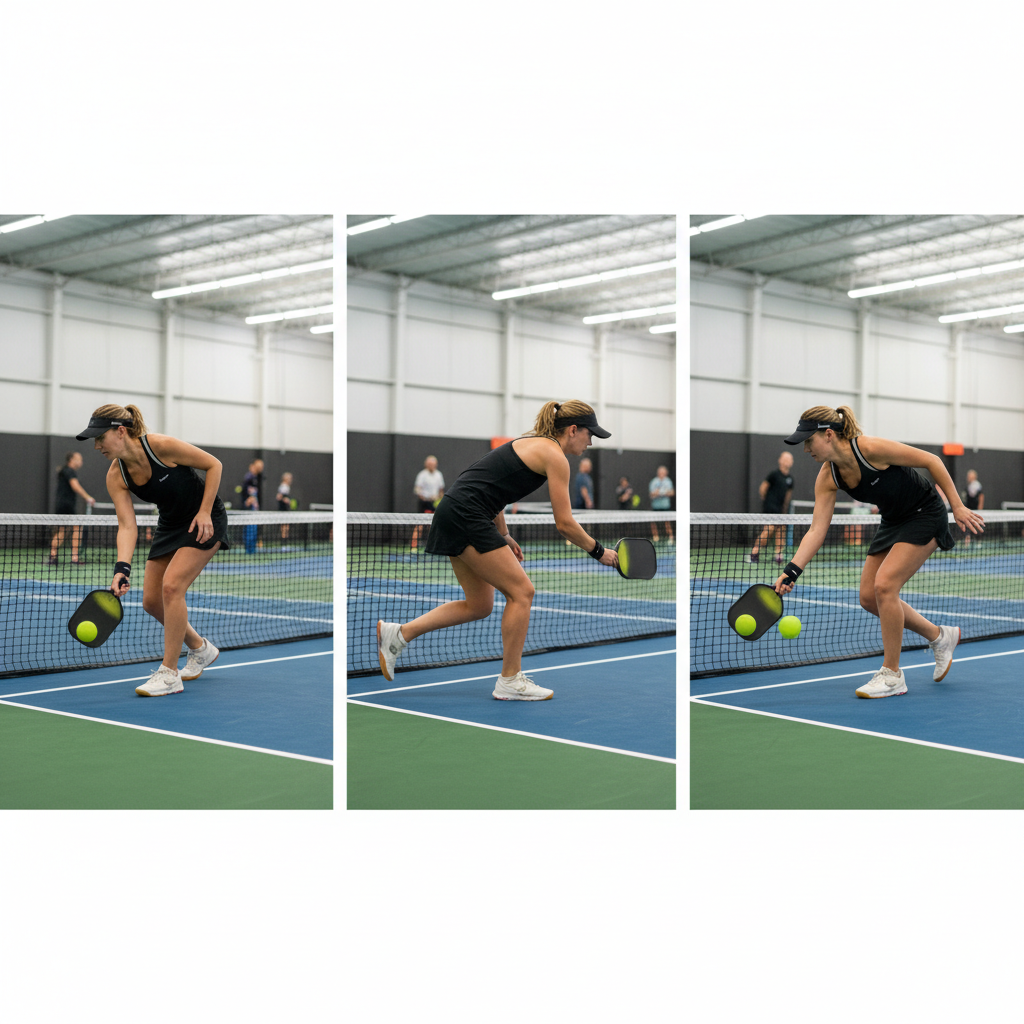
Start at the center of your kitchen line. Hit your first dink to the center target, maintaining a paddle face angle of about 45 degrees open.
Move laterally 2-3 shuffle steps to your right while your partner returns the ball. Hit your second dink to the right target.
Return to center position with controlled steps. Your third dink goes to the left target.
Focus on Consistent Technique
Keep your paddle at chest height throughout the entire sequence. Your grip pressure should stay at about 3 out of 10—firm enough for control, light enough for feel.
Transfer your weight forward into each shot by stepping with your opposite foot. This creates the gentle forward momentum that makes dinks consistent.
Watch your follow-through. It should be smooth and low, finishing with your paddle face still slightly open.
Maintain Smooth Ball Trajectory
Each dink should clear the net by 6-12 inches and land within 18 inches of the kitchen line. Too high and you’re giving your opponent an attack opportunity. Too low and you’re hitting the net.
The ball should have a gentle arc, not a sharp drop. Think of painting a rainbow in the air.
Common Mistakes to Avoid
Overreaching During Dinks
The biggest mistake I see is players stretching to reach balls instead of moving their feet. When you overreach, your paddle face opens too much and the ball sails long.
Take those 2-3 shuffle steps to get your body behind the ball. Your arm should be comfortably extended, not stretched to its limit.
Inconsistent Paddle Face Angle
Many players change their paddle angle mid-swing, causing unpredictable ball flight. Lock in that 45-degree open face before you start the drill.
Practice shadow swings without a ball first. Get the feel of maintaining that angle through your entire swing path.
Poor Weight Transfer Between Shots
Standing flat-footed kills your dinking consistency. You need that subtle forward weight transfer to generate the right pace and spin.
Step into each shot with your opposite foot. Left foot forward for forehand dinks, right foot forward for backhand dinks.
Advanced Triangle Dink Variations
Once you’ve mastered the basic pattern, these variations will challenge your skills further.
Add Defensive Positioning Challenges
Have your partner randomly change the pace or spin of their returns. You still need to hit your target zones, but now you’re adapting to different incoming balls.
This teaches you to maintain precision even when the ball doesn’t come exactly where you expect.
Increase Drill Speed Progressively
Start with a comfortable 3-second interval between shots. Gradually reduce it to 2 seconds, then 1.5 seconds.
The faster pace forces you to make quicker decisions while maintaining accuracy. This translates directly to match situations.
Incorporate Partner Unpredictability
Your partner can now return balls to different locations, forcing you to move more before hitting to your target zones. This simulates real game conditions where you rarely get the perfect setup.
In my experience, this variation is where players really start to see improvement in their match play. The drill stops being mechanical and becomes reactive.
Pro Tips for Maximum Improvement
Practice the triangle dink drill for 15 minutes at the start of every session. Consistency beats intensity here.
Track your accuracy. Count how many out of 10 attempts land in your target zone. Aim for 7 out of 10 before moving to variations.
techniques work best when combined with proper court positioning, which this drill develops naturally.
Focus on one target at a time during your first week. Master hitting to the center target before adding the side targets.
What I’ve found is that players who stick with this drill for 3 weeks see a dramatic improvement in their and overall court awareness.
FAQ
How long should I practice the triangle dink drill?
Practice for 15 minutes at the beginning of each session. This gives you enough repetitions to build muscle memory without causing fatigue that affects your technique. Most players see noticeable improvement after 2-3 weeks of consistent practice.
Can beginners use this drill effectively?
Absolutely. Start with larger target zones (use hula hoops instead of cones) and focus on just hitting the kitchen area consistently. Once you can land 8 out of 10 dinks in the kitchen, narrow down to the triangle pattern.
What equipment do I need for the triangle dink drill?
You need three targets (cones, water bottles, or towels), a partner, and a court. That’s it. The simplicity is what makes this drill so effective—you can set it up anywhere and focus entirely on technique.
How does this drill improve my overall pickleball game?
The triangle dink drill develops spatial awareness, consistent paddle control, and strategic thinking. These skills transfer directly to match play, where you’ll find yourself naturally placing shots to move opponents and create opportunities rather than just keeping the ball in play.